Friday, October 5, 2012

Balloons in my backyard and decorating for Halloween...it must be that time again.

I am still exhausted from the past weekend and its Friday (ready for another long weekend?).  On Sunday  after driving my neighbors to the airport at 6am and taking care of the zoo at my sister's house, I came home to frantic dogs...well, one frantic dog and one wondering what the heck was wrong with the other dog.  Apparently, our neighborhood is a hot air balloon landing site.


View across the street

View of low flying balloon

With the cool weather in the mornings the hot air balloons have been out in mass numbers and this weekend kicks off the 2012 International Hot Air Balloon Fiesta.

It was around this time, taking pics out side my house, that I thought "I should put out my Halloween decorations".


We hung a lighted web outside and put out ceramic pumpkins...
Web and spider closeup


What the web looked like from the living room


I also went to work decorating the inside.


Painted tequila skulls I found at Cost Plus 


I only added the skull and an extra bird...the rest is out all year round


I made the feather wreath, that was above the fireplace, using 4 cheap feathered boas from Hobby Lobby, a tube of foam plumbing insulation from Home Depot and a bird I picked up from Wal Mart.  The whole thing was less than $20.  I plan on buying a wreath form next year and rewrapping the boas around it.  At that point, I will hot glue them down.  


Wreath materials, ignore the glue gun and spider (I didn't end up using them)
I cut, stuffed and duct taped the tubing into a wreath shape.


Sake photo bombing my tutorial pic


I then spray painted the wreath form black, before wrapping the boas around it so the gray wouldn't show through.


 I then just tied them on, tucking the ends up under each other.


Saki photo bombed my wreath


 I tucked the bird in the center and tied a bow at the top to finish it off.  I think it looks pretty nifty.  


Next week, Halloween pillows out of tea towels and maybe, just maybe I will talk about cooking my first pot of beans (so simple, I don't know why I hadn't done it sooner).

Enjoy the foods of your labor.  :-)

Tuesday, August 28, 2012

Banana Cake...maybe

So this post is old.  How old?  Well...we were still living in the apartment.  November and December last year was such a whirlwind of helping out with fundraisers and baking for the holidays, that this post fell by the wayside...forgotten and un-posted.

So today is your lucky day.  Since I am out of town right now and needing to post something, I will dust off this post and give it to you.  Its a good cake that's very tasty during the holidays with or without bananas.  Enjoy!


Banana Cake made for Sean's parents
So...the house guests have left the building.  The house is slowly being put back together and now I have to ramp up and bake for a charity kick-off at work.  I thought it would be easy...the banana cake I had made last week was a total success (thank you Ina...if you haven't gotten the recipe book, "Barefoot Contessa, How Easy Is That", you should)...so I will just make that.  I had perfect bananas; Sean's parents had left them for the cake to be made.  So my thinking;  I will make the cake for work on Thursday night, brilliant...or so I thought.

I walked home for lunch on Tuesday and my perfect bananas were gone...I was pretty sure we had been robbed.  After checking the rest of the apartment, nothing else was missing...so, there must have been a zoo escape and a primate came into my home and took the coveted fruit.  As I was about ready to call the zoo to let them know that they owed me more ripe bananas...I had gone to throw away a tear soaked tissue (yes...I had a shed a few tears for my missing bananas) to find that my bananas had been THROWN AWAY!!!!  HOW COULD THIS BE!?!?!?!?  Who would do such a thing!?!?!?!?!?!?  

I looked to the dogs...they weren't talking.  The cats...well, they were napping.  I then made the phone call..."Sean...Did you throw away my bananas?" ,  "Yep, they were bad" , "No, they were brown" , "Well, they were too ripe to eat" , "They weren't too ripe for banana cake?!?!?" ,  "Oh! *silence*  I'll buy you some more." , "*sigh*  That's OK." *click* (this was on a cell phone, so there was no click,  that was dramatized to show that we both hung up, in case you weren't aware and had thought that I just left him on the phone while I made myself soup...which I may or may not have).

So, that evening Cheryl (my sister) and I made our way to TJs in search of ripe bananas only to find that they were all green. *joy*  She imparted the wisdom of throwing the bananas in a brown paper bag in order to ripen them faster.  Well, that didn't work...by Thursday they were eating bananas not baking bananas. *sigh*

So I made a chef-xecutive decision to make pumpkin cake using Ina's recipe.  Here is the result via my iphone (since in all my agony of not having my bananas I forgot to put my SD card back in my camera *sigh*).


Pumpkin Cake w/ Cream Cheese Frosting

Pumpkin Cake w/ Cream Cheese Frosting 
(adapted from Ina Garten's Banana Cake recipe)
For printable recipe, please click here 

1 c pumpkin puree 
¾ c granulated sugar
½ c light brown sugar, lightly packed
½ c vegetable oil
2 extra-large eggs, at room temperature
½ c sour cream
Grated zest of 1 orange
2 c all-purpose flour
1 tsp baking soda
½ tsp kosher salt
1 tsp cinnamon
½ tsp nutmeg
½ tsp pumpkin pie spice
½ c coarsely chopped pecans (optional)
Cream Cheese Frosting (recipe follows)

Preheat the oven to 350. Grease and flour a 9x2 in. round cake pan.
In the bowl of an electric mixer fitted with the paddle attachment, mix the pumpkin, granulated sugar, and brown sugar on low speed until combined. With the mixer still on low, add the oil, eggs, sour cream, and orange zest. Mix until smooth.
In a separate bowl, sift together the flour, baking soda, cinnamon, nutmeg, pumpkin pie spice and salt. With the mixer on low, add the dry ingredients to the wet ingredients and mix just until combined. Stir in the chopped pecans, if using. Pour the batter into the prepared pan and bake for 45 to 50 minutes, until a toothpick inserted in the center comes out clean. Cool in the pan for 15 minutes, turn out onto a cooling rack, and cool completely.
Spread the frosting thickly on the top of the cake.

Ina's Cream Cheese Frosting:
6 ounces cream cheese, at room temperature
6 Tbsp (¾ stick) unsalted butter, at room temperature
1 tsp pure vanilla extract
2½ c sifted confectioners' sugar (½ pound)

Mix the cream cheese, butter, and vanilla in the bowl of an electric mixer fitted with the paddle attachment on low speed until just combined. Don't whip! Add the sugar and mix until smooth. Yield: frosting for one 9 in. cake.


For Ina Garten's "Old-Fashioned Banana Cake" recipe just click on the link, here

This cake is as perfect for dessert as it is for breakfast.  It will end up being a holiday favorite and your go to, for work pot-lucks and for unexpected guests that stop by...it is that easy to make.

Enjoy the foods of your labor. :-) 

Wednesday, August 22, 2012

Happy Birthday ... have a biscuit

Its inevitable, people are going to have birthdays and you are going to have to buy birthday presents.  What I like to do for birthdays is getting a totally awesome container that I love and giving something baked inside of it, like these biscuits below.  

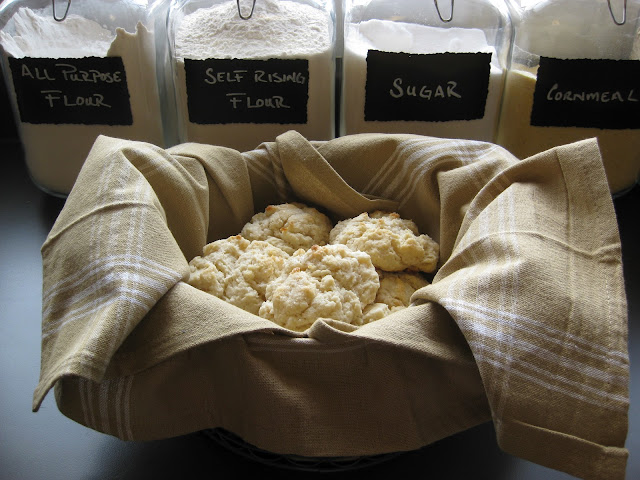
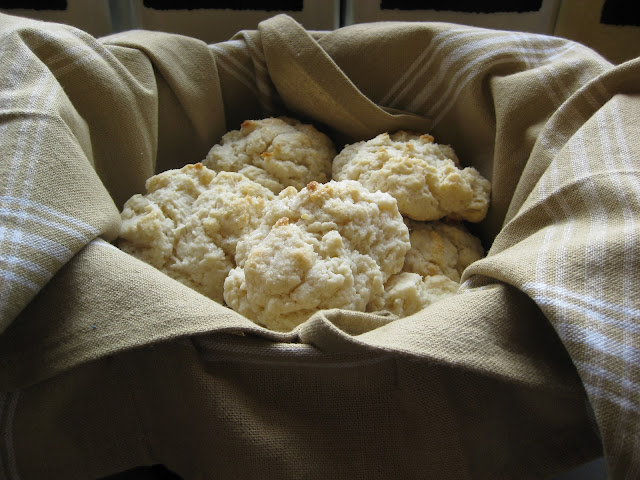
I fell in love with a wire basket at Target recently and had bought one for myself to store eggs that were given to me by my boss.  She had a birthday just recently and I thought she might be able to use a basket like this to store her eggs as well.  Instead of giving it to her empty, I lined it with a couple of tea towels that I had picked up and filled it with these tasty biscuits I baked the morning I was giving it to her.  Add some cool burlap ribbon and this becomes a really pretty present.  


Sour Cream Sweet Biscuits

Sour Cream Sweet Biscuits
For printable recipe, please click here

2 C Self Rising Flour
½ C Butter, melted
1 C Sour Cream
¼ C Sugar + ⅛ C Sugar (keep separate)
½ Tsp Vanilla Extract 

Preheat oven to 425°.  Measure out the flour into a bowl and whisk the  ¼  C sugar into the flour.  In another bowl combine sour cream, the  C sugar, and vanilla extract; whisk together.  Pour the sour cream mixture into the flour mixture, mix together with a fork or pastry cutter.  Pour the melted butter over the mixture and continue to mix until the dough comes together. Using your hands form biscuits, about ¼ C of dough each.  Place on a baking sheet.  Bake until biscuits start to brown, between 15-17 min.  

Makes about 8 biscuits.   


Sour Cream Sweet Biscuits

Sour Cream Sweet Biscuits

The best biscuit basket ever...

What's great about this biscuit is the fact it can work for breakfast with jam or with fresh fruit for dessert, think strawberry short cake.

Enjoy the foods of your labor. :-)

Tuesday, August 14, 2012

A New Year, A New Home, A New Beginning or the end to nonexistent plumbing and Eazy Bake Ovens...

Christmas has come and gone, as well as a few holidays in between...but this story starts on my birthday which is on Festivus (I bet you would have never guessed I was a Festivus miracle).  On my birthday I had to go to the gym in order to shower...not to work out then shower...just to shower.  My shower was backed up...not fun and I had family coming over for Christmas Eve dinner.  So with and inoperable bathroom, I went to the gym to shower.

Sean (the beau) stayed home waiting for the plumber the guy's (my landlords) had called.  All I was hoping for was a working bathroom for the next day so we could clean it and get ready for Christmas Eve dinner.  The plumber showed up and basically told us that the apartment was a wartime build and that the pipes were gone and had to replaced in the back.  *sigh*  Thankfully, he got us to a working bathroom by the next day, so I could prepare what would be my last big meal in my uber small oven.

Coq Au Vin with Asparagus at Christmas Eve Dinner
Closeup of Coq Au Vin with Asparagus at Christmas Eve Dinner  

The plumber would visit 2 more times...I had to knock on my sister's door and ask to take a shower at her place.  We felt displaced, this apartment, though quircky, had served me well for the past 7 years.  We had painted, we had changed out the blinds to nice bamboo blinds, almost every light in the place was replaced with cooler/safer lighting, we had added storage to the kitchen; it was my pefect apartment...until it wasn't.  So I bought a house.  

Well, between the process of buying the house, moving in, being host to my sister and brother in-law while they closed on their home and trying to just get settled in, my blog took a back seat.  So, I wanted to post a few pics of my new kitchen (new appliances, more space, more counter work space, more than 1 electrical outlet and an actual pantry...I really love my kitchen) to kick off the first blog entry of the year and get back on track with posting a bit more frequently than every six months.  


Enjoy the foods of your labor. :-)