Showing posts with label recipe. Show all posts

Thursday, March 3, 2011

Bread...3 ways...

I recently received a recipe from Sean's mom, Vickie, for "Zucchini Bread".  Looking at it, it seemed like a perfect "squash" bread recipe (zucchini or pumpkin, thanks for the term Christa) and I bet  I can get a banana nut bread out of it too.

Not being able to wait to buy zucchini I adapted it for pumpkin bread first, since I had pumpkin on hand.  It was just as I suspected;  it was GOOD.
Pumpkin Bread

Pumpkin Bread, Sliced and Buttered
 Next...I went to the store and bought zucchini a few days later to try out the recipe as it was written.
Zucchini Bread
For printable recipe, please click here
3  Eggs
1 C  Oil
2 C  Zucchini (peeled and finely grated)
2 C  Sugar
3 tsp  Vanilla
3 C  Flour
1 tsp  Salt
1 tsp  Baking Soda
½  tsp  Baking Powder
3 tsp  Cinnamon
2 tsp  Nutmeg* (I added nutmeg, because I like it w/ cinnamon)
1 C  Nuts (optional)
butter and 2 tsp flour to prep 2 loaf pans


Preheat oven to 350°.  Prepare 2 loaf pans, by greasing them with butter and dusting them with flour.  Combine the following dry ingredients in a large bowl:  flour, cinnamon, baking powder, baking soda, salt and nuts (I used pecans).  Whisk together.

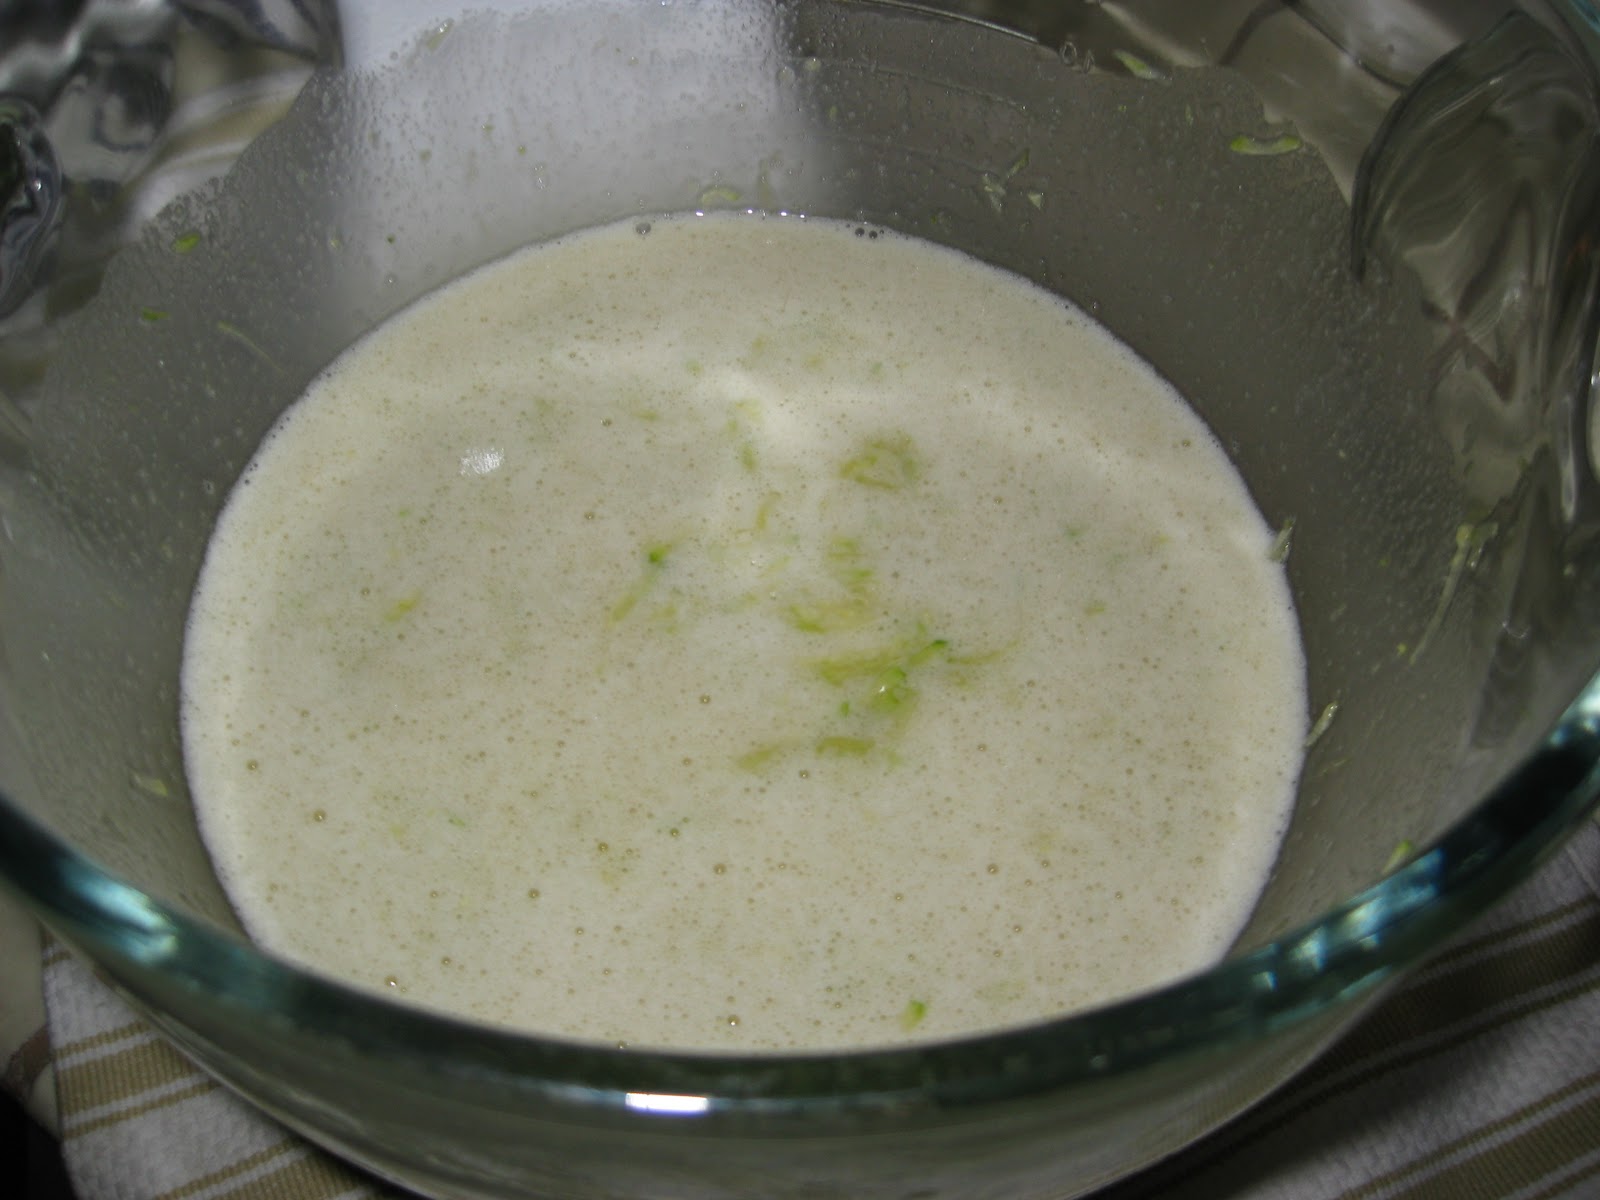
 In a small bowl, beat eggs until light and foamy.

In a large mixing bowl, add:  oil, sugar, zucchini, egg and vanilla.  Mix well.

Mix the flour mixture into the wet ingredients.  Mix well

Pour the batter into the 2 prepped loaf pans and bake @ 350° for 1 hour.

**Variations:  
 For Pumpkin Bread:  Omit zucchini.  Use 1 can pumpkin, ¾ C of oil instead and add 1 tsp pumpkin pie spice, & a dash of cloves.    
For Banana Nut Bread:  Omit zucchini.  Use 2 C ripe banana, ¾ C of oil instead.

What came out of the oven were 2 perfect golden loaves of zucchini bread.  They were a tasty treat.
Zucchini Bread
I want to thank Vickie for the recipe, we have really enjoyed it and its versatility (tonight we bake banana nut bread). 

Enjoy the foods of your labor.  :-)
 

Thursday, February 10, 2011

Tomato Soup for the Soul

When tragedy strikes, I am not one to send flowers or cards...I usually have no idea what to do.  My first inclination is that there has to be a way to fix it, but you can't "fix" everything.  A friend of mine lost his dog recently (an awesome pitty that will be greatly missed)...I felt awful, what can I do to show that I am thinking about him in this time of grief?  So, I made him soup and crackers.

One of my favorite comfort soups is tomato soup.  Tomato Soup and Cheese Crackers may not cure all, but at least it tastes good.


TOMATO SOUP
For printable recipe, please click here
2 Tbs  Olive Oil
26 oz  Jar Marinara Sauce (I used Trader Joes Tomato Basil Marinara)
16 oz  Chicken Stock
¼ to ½ C  Sour Cream
Oregano
Basil
Parsley
Onion Powder
Garlic Powder
Red Pepper Flake

Using a stock pot or dutch over, over medium heat, heat up the olive oil and stir in marinara sauce.  Let simmer.  Add the chicken stock and the sour cream, whisk together in order to get the sour cream to melt thoroughly.  Add the spices to get the desired taste ( I am a bit heavy in my onion, garlic and oregano...everyone likes it differently). Let simmer.  Once heated through its is ready to serve.


 *** RIP Copper, you were an awesome puppy...we will miss you  :-(

For printable recipe, please click the provided link: Tomato Soup


Friday, February 4, 2011

Comfort in a bowl...

If I haven't mentioned...I'll mention it again...its FREEZING here.  Its not as bad as some places in the country, but gosh darn it...its cold for us (our winters are mild from the mid 30s to the 50s in temp).  So in order to keep warm I find I am cooking more...not sure if its the need to have the stove and oven going at all times or the need to eat something hot and melty.  The best of both worlds can be found in making chili and corn bread.  

In trying to figure out what to do for Sunday dinner I became convinced that something with a dumpling had to be made.   Chicken stew with biscuit dumplings on top??? No...there is no cheese in this.  Do I just make chili??? No...there is no dumpling in this...unless...wheels in head are turning, head is starting to hurt, idea forming...I could top it with a cornbread dumpling...genius had just occurred.  Then like divine intervention, an episode of Nigella Feasts  came on and she was making Chili con Carne w/ Cornbread (its like she was reading my mind).  I now had an idea of what to top my chili with...I will top it with cornbread and cheese, Nigella is a genius.  
 
I set about looking for the ingredients in the kitchen; I unfortunately was missing the proper amount of corn meal for her recipe in regards to cornbread...so I improvised.  Using a Trader Joe's cornbread mix and substituting milk for buttermilk, I prepared the mix as indicated and spread over the top of the chili I had prepared.

Chili
For printable recipe, please click here

2 lbs  Ground beef (85/15 is preferable)
2-4+ Tbs  Red Chili Powder (season to taste)
2+ tsp  Onion Powder  (season to taste)
2+ tsp  Garlic Powder (season to taste)
Salt (season to taste)
1+ tsp  Red Chili Flake  (season to taste)
3+ tsp  Cumin (season to taste)
About 1 Tbs  Flour
About 2+ cups Water 

Using a large pot or dutch oven over medium heat, brown the ground beef.  Season with the onion powder, garlic powder, salt, cumin, red chili powder and red chili flake  Once the meet is browned, add the flour to the meat, stir the meat around to be sure the flour is coating it (***be careful with the flour, use to much and it will taste pasty, use to little and the chili won't be thick).  Add the water and continue to heat through adding spices as you need them.  Serve warm with desired condiments (cheese, sour cream, cornbread, fritos, etc. etc. etc.).
 
***NOTE:  The seasonings are not an exact science, this is only a guideline to start from.  Chili powder varies greatly in heat and in taste.  I use the hot stuff that comes in a bag that is usually down the Mexican food isle of your grocery store (here, its not an isle...its a whole store...another reason I LOVE NM).  My mother uses Eagle Brand Chili powder.  I have used McCormick chili powder in the past (its what I could get at the time); it tends to be too bitter for my taste.   You can add oregano to the chili if you like;  I don't for my own, but my mother and sister do add copious amounts of oregano to theirs.  I tend to be heavier handed with my cumin...but that's again up to what you like.  Keep tasting it til its good for you.  This recipe is just a guideline for you to create something great for yourself, cook responsibly.   


After getting the chili stirred up, topped with cornbread batter and that topped with cheese; I popped the dutch oven in the oven on 400° for 25 min.  What came out of the oven was perfect cornbread topped chili as you can see below.  It warmed up the evening perfectly.

Enjoy the foods of your labor.  :-)


Chili before cornbread


Chili with Cornbread and Cheese
Getting ready to eat...I topped this off with a dollop of sour cream


Wednesday, February 2, 2011

Baby its cold outside...

With the weather taking a turn for the worse in NM (...yes NM gets cold and yes NM gets snow, occasionally) I decided that I should make a warm tasty treat last night to help ward off the chill of the evening.

Spiced Hot Chocolate
For printable recipe, please click here
3 ½ c Whole Milk
1 c Heavy Cream
1+ c Semisweet Chocolate Chips
1 tsp Cinnamon 
A Pinch of Salt
1 to 1 ½ tsp  Orange Zest

Heat milk and heavy cream in a saucepan just below the simmering point.  Remove the pan from the heat, adding the chocolate chips;  whisk until melted.  Place on low heat;  whisk in cinnamon, orange zest, pinch of salt and reheat gently.  Serve immediately.


I would recommend serving the hot chocolate in a bowl, like you see above.  Using a chocolate bowl, you keep your hands warm while they are wrapped around this sweet drink...seriously what can be better than that?

Enjoy the foods of your labor.  :-) 

Tuesday, February 1, 2011

Cheesecake sauce flight....

So the sauces have been made and the table was set...


Brown Butter Bourbon Sauce
For printable recipe, please click here
2 C  Heavy Cream
½  stick of salted butter, cut into 4ths
½ to ¾ C  Dark Brown Sugar
2 tsp Bourbon
½  tsp kosher salt

In a medium sauce pan whisk all ingredients together.   Bring to a boil, continuing to whisk occasionally.  Reduce heat, continue to cook for 15 more minutes.  Turn off heat, let set for 10 minutes before serving.   Serve warm.  Refrigerate leftovers. 


Blackberry Reduction
For printable recipe, please click here
2 - 3 C Blackberries (fresh or frozen)
½  stick of salted butter, cut into 4ths
½ to 1 C Sugar
½ to 1 tsp  Balsamic Vinegar

In a medium sauce pan, on medium heat, add blackberries and butter.  The butter will completely melt and the blackberries will start to become very juicy.  Let simmer for about 5 min. after butter has melted.  Stir in desired amount of sugar.  Sugar should melt pretty quickly and the berry juice should start to thicken up.  Splash with desired amount of balsamic vinegar.   Pour berries into a strainer over a bowl in order to sift out seeds.  Serve warm or cold. Refrigerate leftovers. 


Chocolate Orange Ganache
For printable recipe, please click here
2+ C  Semi-Sweet Chocolate Chips
1 to 1½ C  Heavy Cream
1 Tbs  Salted Butter
2 - 4 Tbs  Sugar
½  to 1 tsp Vanilla Extract
Orange Zest
Pinch of Kosher Salt

In a medium sauce pan, over medium high heat, whisk together: cream, butter and sugar.  Let this come to a boil, whisking occasionally (DO NOT LET IT BURN ON THE BOTTOM).   Take it off the heat and whisk in the chocolate chips; whisk until they are completely melted.  Put it back on the burner, low heat, whisk in vanilla, salt and orange zest.  Serve warm.  Refrigerate leftovers.   


 All went well with making the sauces.  They went much faster than the cheesecake baking the night before (25 min per pan x 8 pans is a lot of baking time).  I was done with all 3 sauces with kitchen clean up in less than 2 hours.  I put the sauces in plastic squeeze bottles for easier transport/serving (you can microwave in the bottles as long as you don't over do the time...20 sec per bottle w/ stirring in between the 20 sec. intervals).

They were tasty and a perfect complement to the cheesecake.  I hope everyone enjoyed the sauce flight at work.

Enjoy the foods of your labor.  :-)   


Monday, January 24, 2011

The "Mini Me" of Cheesecake...


The office birthday party for the month of January is coming up soon.  I am in charge of arranging it by myself, since my birthday is the only one in December (thanks mom and dad...why is it that everyone I know has a December birthday, but the people I work with???).  I decided that the more difficult I make my life the better...so instead of bringing in a store bought cake of some sort, big enough to feed an army, I would make cheesecake for the 40+ people that work here (I think its around 40 give or take...I can't seem to count beyond 10 with my shoes on).  It also occurred to me that making a cheesecake in the normal spring form pan would never do for a few simple reasons...

1.  I am pretty sure you can only get 5 servings out of a cheesecake this way.
   
2.  By the time the third person has tried to get their slice, the thing would look so mangled that nobody would want to eat it.  

So I got the idea that using muffin tins and cupcake papers would be the way to go to make little individual servings of cheesecake.  Then I started to stress...how the heck do I take a full cheesecake recipe and bake it in little mini portions???  Will it stick to the paper???  How am I suppose to get all of these too work in a nice manner???  AAAAAAHHHHHH!!!!!

I took a breath and "GOOGLED" it; someone, some where, must have baked these at some point in time...right?  Google didn't let me down, I was lead to a blog, Rainy Days and Sundays, in which they had made mini cheesecakes similar to Giada's Individual Orange Chocolate Cheesecakes from Food Network.  This was a good start to figure out the cooking time with the recipe I was going to use.  I was starting to feel less stress, as long as the things didn't stick to the paper...feeling more stress again.  AAAAAAHHHHHHHHHHHHHHHHHHHH!!!!!!!!!!!!!!!

So at 9:00pm, last Monday,  it was time to make my tester cheesecakes (don't ask me why I started at 9pm, maybe I like stress and no sleep).  I started off by mixing up graham cracker crust for 1  9in  pie.  After placing all of the papers in my muffin tins, I pressed a respectable spoonful of crust into each paper and then pressed it down with my 2 Tbls All Clad measuring spoon (they are perfect for this since they are flat on the bottom).  I set the pans aside and started on the cheesecake.

Cheesecake 
For printable recipe, please click here
5 pkgs (8oz ea) Cream Cheese (room temp)
1 ¾    C  Sugar
3 Tbs  Flour
2 Tsp  Lemon Zest
1 ½ Tsp  Orange Zest
¼ Tsp  Vanilla Extract
5  Eggs  +  2  Egg Yolks (room temp)
¼ C  Heavy Cream (room temp)

Preheat oven 350 °.  In a large mixer bowl w/ the paddle attachment; blend cheese, sugar, flour, zests, vanilla at high speed.  At medium speed mix in eggs & yolks 1 at a time, mixing until smooth, occasionally scraping the bowl w/ a spatula.  Mix in cream.  Pour into prepped muffin pans, about 3/4 full.  Bake at 350° for 25 min. or until a toothpick test is clean.
***(For full cheesecake, using a spring form pan; preheat oven to 500°, pour the cheesecake mixture into prepped spring form and bake for 10 min.  Lower heat to 250°, bake for another hour.  Remove to cooling rack and let cool for 2 hours)


I let the little guys cool down in the pans for about 5 to 10 minutes before lifting them out.  Use two hands to pull out or else the paper will try to come away from the cheesecake.  The paper peeled away like magic and no part (cake or crust) stuck or tore apart.  This little idea created, in all, 48 lil cheesecake minis.  I did need to make extra crust in order to finish op the batter.  

Next blog, I will talk about my sauces I am planning for these little bits of heaven, a blackberry reduction, a brown butter bourbon sauce and a chocolate ganache (I have never ganached anything, I am very excited!!!). 

Enjoy the foods of your labor.  :-)


Thursday, May 20, 2010

Cinco de Mayo was when???

Ok...you're right, I have been a bad blogger. I meant to get this up before I went out of town, then I meant to do it while I was in San Antonio, then...well...yeah, I know. So here it is, better late than never.

We had a small get together at work a few weeks ago, to include a salsa contest for "Cinco de Mayo". I thought to myself "What would Brian Boitano make...", he would make SALSA!!!! Not just any salsa, he would make an awesome salsa, so that's what I did, minus a stunt chopper for the onions (I wonder how much he
pays his stunt chopper to chop his onions on the show???).

I am now going to give you the secret family recipe for the ultimate chili pequin salsa
:

Chili Pequin Salsa, a family recipe
For printable recipe click here
1 large can diced tomatoes in juice
4-6 cloves of garlic, minced
1 medium onion, chopped
about 2 Tbls Mexican oregano, ground up

2 to 4+ tsp crushed chili pequin (you can get them already crushed in the
Mexican spice section of your grocer)
onion pow
der (to taste)
garlic powder (to taste)

salt (to taste)

Mix all ingredients in a large bowl. Put in a blender and pulse a few times to mix
everything together. Pour into your serving bowl and enjoy.


Personally, this is one of the easiest recipes to make and usually goes over really well at parties, at least at my sister's parties. I think Brian Boitano would be proud (and if you don't watch his show on FoodNetwork on Sundays, YOU ARE MISSING OUT!)


Wednesday, May 5, 2010

The dreaded office potluck...

Nothing fills me with such dread as an office potluck, a place where you can be judged by your peers in the form of the amount eaten of the dish you brought. When I was in Germany, working for the contracting office, we had a 26th ASG (Area Support Group) breakfast held every month, in which the ASG would be split up in two halves, each half providing food every other month. I learned the dread and fear based off the fact people would look at my dish, curl up their nose and say "WHATS THAT?!?" in the most nasally, insulting way possible...like these people had never seen chorizo before (well, they probably hadn't...but that's no excuse, chorizo con huevos y papas is delicious)

Anyway, getting b
ack to my dread...our office here decided to have a pot luck lunch for a training seminar recently. I was out of town the weekend before and had NO IDEA what I would be bringing. My indecision left me powerless; one minute I thought to bring dessert, the next minute it was pesto pasta salad (an idea I nixed due to the fact I was convinced it would cost at least $52 or more in ingredients...2 cups of basil packed, that must be 10 or 20 little packages at $2 a pop, right???).

Inspiration hit the day before the pot luck, and the day I would be traveling home...I was watching "Giada at Home" and she made the easiest, most beautiful Italian potato salad. That was all I had to see, I would make potato salad, just not Giada's potato salad. Mine is based off a recipe from my sister (sh
e makes a baked potato potato salad, its awesome) and a herb dip recipe I use of Ina Garten's (BTW, if you are ever searching FoodNetork for recipes and Ina pops up as an option, use that recipe...oddly simple with the right amount of prep and always delicious).

Here's the recipe:

Dill Potato Salad


about 4 lbs New Potatoes (scrubbed)
4 Tbs Fresh Dill (finely chopped)
2 to 3 Tbs Fresh Parsley (finely chopped)
4 to 5 scallions (chopped, to include the white bits)
1 to 2 tsp Salt (or to taste)

about 2 tsp Fresh Ground Pepper (or to taste)
1/3 c Mayo (may need a little more or a little less depending on the consistency of the dressing)

1/2 c Plain Greek yogurt
6 to 8 strips of bacon

Start by boiling your cleaned potatoes until they are cooked through but still firm about 20 to 30 min., drain and let them cool a bit. Start frying the bac
on in about inch long pieces for larger bacon bits, trimming some of the excess fat off. Once the bacon is done, drain the bits in a paper towel and let cool. For the dressing, combine the: yogurt, mayo, salt and pepper, whisk together. Add the scallions, dill and parsley to the dressing whisking gently and set dressing aside. Cube the potatoes in small bite size pieces leaving the skins on. Place the cubed potatoes in a bowl and let cool for a few minutes more. Take the dressing and add 3/4 of the bacon bits to the dressing, whisking it together gently. Keep the remainder of the bacon for garnish at the end. Combine the dressing with the potatoes stirring gently so the potatoes don't break up too much. Top off potato salad with the rest of the bacon bits and some extra chopped dill and parsley to give it color.


Needles to say, the day of the potluck this potato salad was a big hit, with only one small scoop full left at the end. My cooking ego was happy. Maybe I will even bring my chorizo breakfast dish one morning for these people...maybe. ;-)

Enjoy the foods of your labor...cook on my friends.

(how's that for a tag line...anything working for you guys yet??? Comments appreciated. :-) )

Friday, April 23, 2010

Kitchen trippin...

Last weekend I was visiting my parents down in Cruces and I informed my mother about my new blog venture. I tried to tell her about it, the concept, even showed her my first entry. Actually, I am not sure if she read it or just became mesmerized by the pictures of the French Toast Bake...if a picture is a thousand words, I guess she didn't need to read any further. I was informed that I would be making this for her and dad the next morning.

Its is never easy cooking in a kitchen that is not your own...I may have baked a pumpkin pie or 2 since I have entered adulthood in my parents kitchen, but that is not real baking/cooking (which is making anything that involves more than: 2 bowls, 3 types measuring spoons/cups , 2 stirring spoon, a hand mixer...if I need to get out my standing mixer, w
atch out we're gettin serious now :-) ). Go ahead and ask my boyfriend, I try to do proper "mise en place", which means I will have dirtied up every small bowl in my kitchen, which he diligently washes and dries for me (I know, he's a keeper)...so, needles to say I tend to be a bit of a high maintenance cook. So its even more nerve racking trying to make something successfully in someone else's kitchen. The only thing I had going for the success of breakfast the next morning is the fact that the French Toast Bake i make is a FOOL PROOF recipe (which is the best kind of recipe to have up your sleeve).

What makes this recipe fool proof is the simplicity of its ingredients and the correct measure of the liquids. I have had a hard tim
e with French Toast Bakes and Bread Puddings in the past; too many eggs and you have an omelet, too much half n half and it never bakes up right, too little custard and its dry, too much custard and its just soggy and gross. So I searched and searched on FoodNetwork.com for a Bread Pudding recipe for this past Thanksgiving and hit the jack pot with Aaron McCargo Jr.'s (aka Big Daddy) "Apple and Cranberry Bread Pudding". His liquid to egg ratio was PERFECT for both the tasty breakfast treat and the decadent dessert we love to eat topped with ice cream and caramel sauce. I made a few of my own changes to the recipe that I thought it needed, but hey that's what makes us a star in our own kitchen.

Here is the basic French Toast Bake/Bread Pudding Recipe:
For printable recipe, please click here
For the bread:
1 loaf Challah or
1 pkg Brioche Buns from Trader Joes (they are cheaper than buying a loaf of brioche) or
1 baguette (preferably a day old)

For the custard:
6 eggs
2 c heavy whipping cream or half n half or eggnog (eggnog is perfect for a richer taste)
1 tsp salt
1/2 to 1 c dark brown sugar
1 to 2 tsp nutmeg
1 to 2 tsp cinnamon

1 tsp pumpkin pie spice

Preheat your oven to 350 deg. Grease a 9x13 cake pan with butter or bacon grease. Cube the bread in about 1 in. pieces (for bread pudding take the crust off first before doing this). Place the bread cubes in the cake pan and set off to the side to let them dry out a bit, they will absorb the custard better if they are a little stale . In another bowl w
hisk together the eggs and the heavy cream. Whisk in the remaining ingredients. Pour over the bread, be sure to carefully spoon the custard over the cubes so the bread is well coated. Put in the oven for 40 min or until it springs back to the touch (which should be 40 min.).

So, after 2 hours of navigating my way through a kitchen that was not my own (usually this takes, maybe 1 hour to an hour and a half to make, depending on your topping), I recreated the breakfast dish that you saw posted below and to the left. I know my mom liked it (since she commented on it in the previous post) and dad thought it was "pretty good...", which anything coming from him would mean a success.

Cook for the pleasure, cook for the glory, cook like there is no tomorrow.
*(ok...I am working on an ending catch phrase, we'll see which one sticks ;-) )

Monday, April 19, 2010

BACON!!! Bacon Bacon Bacon!

Here it goes...my first blog entry. This blog is about me...my cooking...and how FoodNetwork inspires me to be the chef-leberty that I am (in my mind). My TV is on the channel, not quite 24/7, but its close. I watch my favorite shows and then get a wild hair to make the thing that is on (which means a trip to Trader Joes and who doesn't love that) or trying to make something inspired by said show in less than 30 minutes...which is not possible in a kitchen the size of a small walkin closet. So basically, this is a blog about the common cook striving for FoodNetwork greatness in not so perfect kitchen surroundings...did I mention I can just barely fit one cookie sheet in my oven.

Well, for this weeks inspiration...I tune
d into "The Best Thing I Ever Ate...With Bacon". Since you do not know me yet, you should know I LOVE bacon. BACON!!! It makes me smile just typing out the word. The smell of bacon on the weekends wafting through my apartment is better than any room freshener. Anywho, this show featured bacon and what it could do for food when added in unique ways, like an onion marmalade for a burger filled with BACON. So I decided that I too should use bacon as more than just a side and was inspired to create a

Candied Pecan and Bacon Topping

recipe to put over my french toast bake.


Candied Pecan and Bacon Topping
For printable recipe, click here
2 cups chopped pecans
6 strips of bacon, be sure to cut off extra fat
about a cup of brown sugar
about 2 Tbls salted butter

Using your kitchen shears, cut up the 6 strips of bacon into about h
alf inch chunks into a cast iron skillet on medium heat. Get the bacon crispy, but don't burn it (trust me this is not an easy task when you are doing 5 things at once). Put in a paper plate with paper towel to absorb grease. Pour excess grease from the skillet into your bacon grease container (yes...save your bacon grease for strategic cooking purposes, I didn't know bacon grease WASN'T suppose to be in vegetables until I was 15) but be sure that you have enough grease left in the pain that it just coats the skillet and it looks shiny, but not soaked. Put the pecans in the skillet and brown them over medium heat, stirring occasionally. Once the pecans get shiny and are starting to brown slightly, throw the butter in the skillet with the pecans. When the butter has melted, stir in the brown sugar. Last, throw the bacon back in the skillet and saute for a few minutes more. The sugar should stay a bit granulated. Turn off the heat and let set. Losen the mixture with a wooden spatula and put over french toast bake or what ever else you would like...vanilla ice cream would be a good option for this topping.


These are the pictures of the final outcome, can you see the bacon...I put it over the french toast bake when it was half done so the brown sugar could melt a bit to create a gooey goodie goodness on top.